Wednesday, April 29, 2015
Done! (50)
Everything has been fine tuned as much as possible. I added a coat of clear nail polish to the entire ring so that the metal would not oxidize and tarnish as quickly and it will not turn my finger green when I wear it!
Flush
The inside and outside have been filed flush, next step is sanding everything down and polishing the brass to make it shiny 


Almost there!
Now the brass is soldered onto the copper sheet as well and the hole has been sawed out. Next step is to file the inside and outside flush to the brass ring.
Soldering things together
I started by soldering the copper ring (the inside) onto the copper plate. Then I pickled it and sanded down the excess solder so the brass ring would fit over it and lay flush.
Making the Bottom of the Ring
All I did was trace the biggest ring onto a copper sheet, leaving a slight lip so I have room to work with. Next I'll trace the smallest ring inside (with a lip) and drills hole in the center so I can cut it out later.
Monday, April 27, 2015
Sanded and finished brass ring
Here is the finished brass ring all polished and pretty. Now the ring is on the small side and the copper ring doesn't fit inside so I'll have to put it in the ring resizer to make it and the copper ring (the copper ring doesn't quite fit my finger) bigger.
Thursday, April 23, 2015
Design on brass ring (40)
So I knew I was going to have to do something with the brass ring like a texture or something different than a plane mountain silhouette so I cut out geometric shapes.
Etched phrase
I desided to use spray paint to etch the inside of the copper ring. So I spray painted it and I'll scratch the phrase "the mountains are calling and I must go"
Monday, April 20, 2015
Order of business
1. Etch phrase onto inside of copper ring.
2. Make copper into ring shape and solder
3. Draw and cut out silhouette in brass
4. Roller print texture onto brass ring and liver of sulfer it and sand
5. Make brass into ring shape and solder
6. Fit copper into the brass and solder the copper plate to the flat side
7. Cut back plate to fit ring and sand/file
8. Final changes and tumbler
9. Coat with nail polish so it won't oxidize
Hollow ring decision
This part of the ring will go on the inside-touching my finger. The outside will be a shorter version of the copper mountain silhouette and of brass. The bottom that will connect the two will be copper and soldered together. I also plan to etch the phrase "endless love" inside the copper ring. I am currently working on ideas for texture on the ring and I'm thinking a leaf imprint.
Friday, April 17, 2015
Wednesday, April 15, 2015
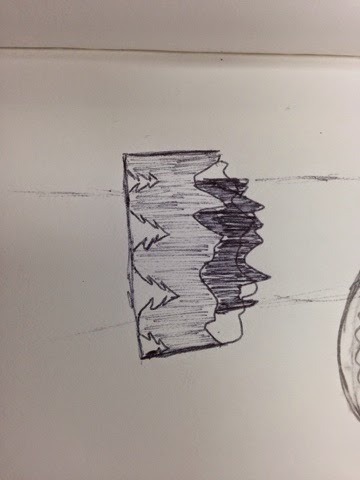
Hollow Silhouette Ring
Idea #1:
Hollow ring with mountain silhouette cutout on outside and mountain outline on inside. Might put a stone setting on inside hollow part and let it show through the mountain cutout.
Idea #2:
Tuesday, April 14, 2015
Finished pendent with chain!
This is how I attached the pendent and "branch" peices to the chain. I was quite pleased with myself that I found a way to attach them without soldering them on so they could move freely.
Subscribe to:
Posts (Atom)


